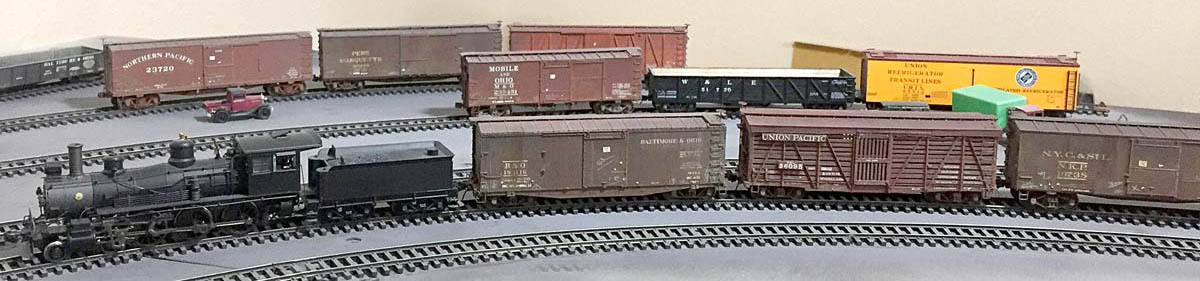

After working through the layout adjustments noted in the last blog post, additional issues have turned up. There are two locations on the Wheeling Freight Terminal where curved track crosses layout sections at an angle, as can be seen in the lead image. One or two tracks have been problematic but now the problems have increased after setting up the layout in a new home. Click on any image here to review larger size.
Operation has always been a focus of the layout. After fixing the last round of problems, a simple push of cars across these curved joints has revealed additional areas of concern. Adjustments to these tracks had been made while in Texas to minimize the problems, but it’s now time for a new method.

Short sections of track will be installed to bridge these layout sections and minimize problems. The three tracks in the above image are all part of the freight house area and the center track is a lead to switch the freight house. These will each be cut about three inches back from the interface where the two sections meet. The bridge tracks will be installed here.

Another couple of tracks will need the same work. The foreground pair are the chief culprits here and will also be cut back for bridge sections. The front track connects the yard and freight house area while the next one back connects the yard and team yard. The background tracks are part of the team yard and freight cars seem to roll fine over those joints.
I want to operate the layout while we are in this rental so the work needs to be done. The layout will move again when we purchase a new home and will operate for a few months there while a new project takes shape. I’m not a big fan of these bridge tracks but a little work now will ensure more fun for months to come.
I’ve unpacked some of the freight car fleet anticipating the first session. Minimizing derailments are a key to enjoying operation and the bridge tracks will maximize the enjoyment.

Thanks for dropping by and reading the blog. Share a comment in the section below. Please follow the instructions so your comment can be posted. All comments are reviewed and approved before they appear. To subscribe to this blog, enter your info for a comment and check the last box to notify of new posts by email. Please share the blog link with other model railroaders.
Can you cut just the rails and insert replacement rail rather than using track with ties?
Bill
Bill, that’s a thought but I’m uncertain if the rails will follow the curve if they are separate sections. A bridge track at least can keep some of the curve. – Eric
I had the exact same problem when I moved my layout from Reno to Las Vegas. Some of the tracks wouldn’t line up and I have no idea why they didn’t. Probably had something to do with the heat these modules were exposed to in Las Vegas. I ended up building bridge tracks over the gaps to get things to work right.
Yay! Success! Thanks Nevin! – Eric
Be sure you take into consideration the seasonal movement due to humidity. It appears you are now in a humid situation which could cause those gaps – until it dries out. One solution is to make those bridge tracks removable and adjustable..
David, I did factor humidity into the situation but some rails are not even lining up across the joint. It’s more of an alignment problem than a gap problem. – Eric
Looking good Eric
Eric, bridge sections from flex track. After getting them in place begin replacing some ties with pc board ties till you get them all in place, say three ties each side of the gap. When soldered the tracks will stay in the curve you previously set and in gauge. Make sure you gap the pc board ties so you do not cause a short. Many folks do this over lift bridges etc so the can maintain alignment.
Just make sure do not have mis-alignments on bridges over Big Wheeling Creek so you do not have cars and locos dropping 20 feet into the water.
Ha! Right Jerry. Scenery was not a focus on the layout so Wheeling Creek and the bridges that span it are not modeled. Although all this talk of bridge tracks makes it sound like a real bridge is involved. – Eric
I hope you get it all worked OK – looking forward to seeing the results. I am writing to thank you for all of your info on modelling the twenties. I currently model the thirties (Model Railroader, May 2016, A Steam Era Switching Layout) but think I will backdate to the twenties. I love the older rolling stock and the greater variety back then. My roster is currently pretty heavy in Accurail pre-36′ boxcar kits, but I am trying to update – err, I mean backdate it. the new Accurail 36′ kits are a welcome addition but I am also trying some scratchbuilding – more fun. But I am still desperate to find more info and resources about modelling the ’20s. Any additional sources for modeling this era you or your readers can give me would be greatly appreciated. thanks again for your blog. I just discovered it but I will eagerly follow it!