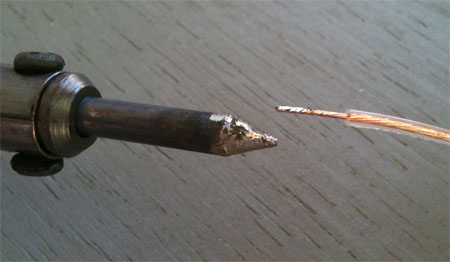
Model railroading is the sum total of a variety of elements as an individual builds their dream layout. History, carpentry, engineering, painting, geology, architecture, electronics and electrical, and other components all combine for the final presentation. Each of these components may have additional aspects. As an example, electrical can consist of work with switches, relays, wire, and soldering.
I hate soldering.
I have always hated soldering. Before diving into the latest layout project I realized I would have to do lots of solder work. I needed to develop a process to excel in soldering and minimize my efforts.

Here are the basic tools I used in most of the soldering situations on the current layout project.
- A 30 or 40 watt pencil soldering iron
- Rosin core flux
- Solder – a silver bearing type is recommended
- A small flat head screwdriver
- Wire strippers
- Flush cut nippers
- Needle nose pliers
- A jeweler’s file

Additionally, I used these tools that did not fit into the first image.
- A motor tool with chuck key and a wire brush
- Eye protection to use with the motor tool
- An X-Acto knife
- Wire, of course
I recently attached electrical leads to several yard tracks. With all the tools at hand, here are the steps I followed.
1. Clean surfaces, if needed.

2. Apply small amount of flux.

3. Tin parts with a small amount of solder.


4. Hold parts together and apply heat. Add a small amount of solder if needed.

5. Clean up after parts cool.
There is often a bit of solder or flux to remove after parts have cooled. A flat jeweler’s file can remove excess solder from the top of the rail or along the tread. The rail needs to be smooth for optimal equipment performance.
I try to remove as much flux as possible from the work area. Fold a paper towel a couple of times and dampen the towel with isopropyl alcohol. Rub the top and sides of the rail where you can see flux residue. Pinch the wet paper towel around the soldered parts to remove as much flux as possible. Cleaning off the flux can lead to better paint adhesion on the parts when you paint the rails.
Here’s how a few of the new electrical leads look just after soldering and cleaning.

Now you have a simple process to follow when you solder. Practice with scrap track pieces and wire so you get the feel of it. Just remember a few things.
- Always pick up a soldering iron by the handle.
- Do not solder above your head or body. Drops of hot solder will burn skin and do not come out of clothing.
- Minimize distractions and focus on the tasks at hand.
I welcome your comments. but all comments will be reviewed and approved before they appear here.

Eric,
Thanks for posting pictures of a “necessary evil” in model railroading. I have the opposite response of getting to the wiring and soldering stage. My reason is the fun part (running trains) is close at hand.
A suggestion, if you don’t mind. Think about heat sinks on either side of your soldering location to help dissipate the heat as it tries to spread long the rails. These heat sinks can be as simple as wet cotton balls resting on the rails near your soldering location.
Thanks again for sharing!
Tim
Thanks for your thoughts, Tim! A heat sink would help as someone gets rolling. As I went through the processes on many soldering tasks my skills improved as I went along. Tinning the two parts reduces the time needed to heat. I do have a couple of spots where the ties slightly melted, but the rail stayed in place with no gauge problems.
As I hate soldering, adding a couple extra steps with a heat sink did not appeal to me. I just wanted to complete the work and move along. To each their own!
– Eric
Okay Readers, as you can see, this comment area is functioning again! It took a few passes through all of the plug-ins, but I think we are back to blog-normal. I even found a better spam filter which cuts down on my blog tasks of deleting the ads and spam for fake Gucci bag, medicinal aids, and Russian women…. Yeah, and people think model railroaders are nutty….
More posts are coming soon! – Eric