
The last blog post reviewed the new layout lighting that has improved the general room environment. Back in April, the workbench lighting was upgraded and I just didn’t get around to posting the details. Since it ties in well with last week, let’s take a look at the workbench lighting.
The workbench is where we need above average lighting as we detail models, apply decals, or fix locomotives and rolling stock. We build at this workplace and it requires strong lighting. A couple of the clamp-type shop lamps equipped LED bulbs were the main workbench lighting for years. This past spring, I noticed it was difficult to apply decals to certain types of freight car surfaces as the lighting was uneven. I think it was a conversation on the Proto-Layouts YahooGroup that spurred me to upgrade the workbench light.
A Torchstar 22-inch Extendable Under-Cabinet Light was purchased from Amazon. It’s actually a package of two 22-inch lamp fixtures. The light is rated at 4200K and a cool white color. It has the smaller T5 tube size and has a Plug & Play design. It is not quite the same light as the 5000K lamps that illuminate the Wheeling Freight Terminal layout, but I do not paint at the workbench.
The workbench sits below the layout benchwork and there is a little room to mount the lights. One irritating aspect of this product is a lack of installation instructions or directions. Nothing was found on the Torchstar website. But hey, we build stuff, right? This can’t be too difficult. It was easy to figure out, once the parts were set out and reviewed. Naturally, the fixture mounting pieces did not line up with any of the benchwork components so it was mounted to a scrap piece of 3-inch plywood, which was then attached to the benchwork.

Here’s a look at the install. The two fixtures have separate on-off switches, making photography easier. From the top of the image down, the light color piece at the top is one of the stringers in the box grid benchwork section. Perpendicular to that piece is the plywood the fixtures were mounted upon. The light fixture is next with one set on and the other switched off. The layout fascia is visible just below the light. It extends three inches below the benchwork. Then you can see me looking at my phone in selfie mode to snap the image.

The fixtures are directly plugged together and a power cord is plugged into the far end. This extends to the workbench plug strip for power. I think it took more time for me to figure out how to mount these than the actual project execution.

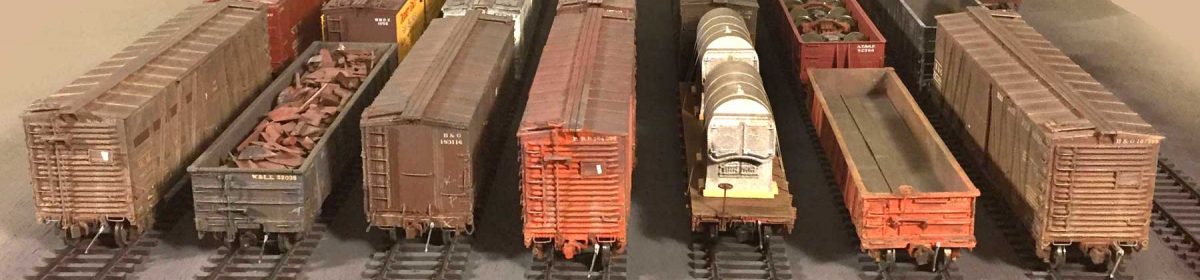
A few models were placed around the work space to illustrate the light coverage of these LED fixtures. I have been very happy with these at the workbench. The even light coverage made the work of decaling a Reading mill gondola much easier than some tasks done earlier this year.
Thanks to Den, Rich, T.J., and a few others for answering LED lighting questions back in April. I know a few people read your comments!
Thanks for dropping by and reading the blog. Share a comment in the section below. Please follow the instructions so your comment can be posted. All comments are reviewed and approved before they appear. To subscribe to this blog, enter your info for a comment and check the last box to notify of new posts by email. Please share the blog link with other model railroaders.
Eric are you using the On/Off switch on the power strip to control your fixtures?
Bill, yes. I use the On/Off switch on the power strip to turn the benchwork lighting on and off. One of the layout lights is also plugged into this strip. – Eric
My paint booth fan, light and compressor all turn on via the switch on their power strip whileon the workbench my Ott-Light and MRC power pack for my little drill are controlled from another strip.
Exactly, Bill! I do the same but the paint booth is not set up in the layout room. – Eric
Eric, Looks good. I like the idea of having the workbench under the layout so you can use more real estate for layout. Also makes the layout at eye level. Jerry
I’ve had my layouts at a high level for years and like the workbench under a portion. The Wheeling Freight Terminal rail sits at 53-inches off of the floor. Fitting a layout into a spare bedroom forces you to maximize the space usage. – Eric