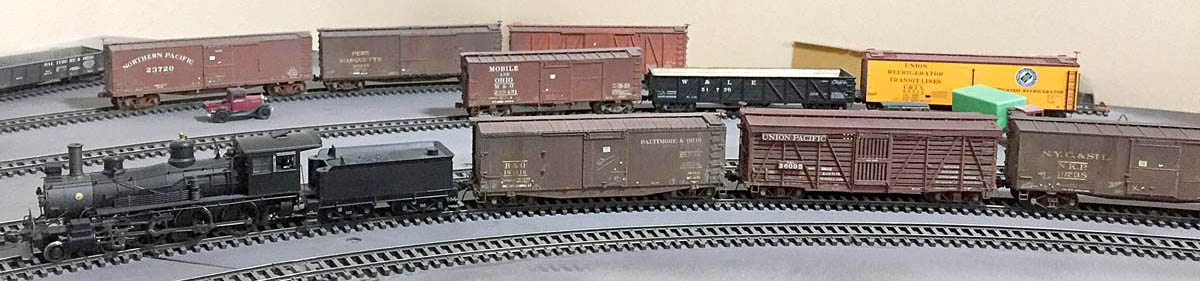

Several freight car models have been completed over the last few weeks. They’ve been painted, decaled, and weathered!
The spray booth has been busy with primer coats, car color coats, clear gloss coats before and after decaling, and clear flat coats to dull the final finish and provide tooth for the weathering. With all of these steps, each model can take time to complete. I’ll feature a couple at a time on the blog. With luck, I’ll wrap up a few more!
Ventilated box car
A friend of mine created digital drawings for the Chesapeake & Ohio 36-foot house cars that were built in 1922-23. A box car, automobile box car, and a ventilated box car were all built to the same design with the proper hardware for the special services. All three are available from Yuma Car & Foundry and produced by 3D Central as 3D printed models. I built the ventilated box car late in 2025 and featured it on a blog post.

I finally painted a primer coat on the model in August and the car color in September. I used Vallejo Model Color Cavalry brown (70.982) then a gloss coat before applying the decals. The image above was snapped just after finishing up one side of the car. The roadname decals were not sized to fit the space, so the model sat for a few weeks until proper decals arrived.

I received the decals in early October and applied them. A day later, I sprayed on a clear gloss coat to seal the work. But when the gloss dried, I ended up with the mess in the above photo. I am using an old bottle of Future gloss acrylic floor wax. It seems to react with the Solvaset and/or MicroSol decal setting solutions I used to make the decals snuggle down. This had happened before on another model several years ago. Applications of Solvaset minimized the cloudy effects but they were not eliminated. I decided to continue on with the weathering.
By the way, a friend suggested brushing water over the dry, completed decal work to wash away remaining setting solutions. This needs to be done before the gloss coat that seals the work. I’ve done this a few subsequent models with very good results. It’s just another step along the way to completion.

Before I applied a flat coat, I carefully applied Vallejo brown model wash (76.514) to the screened areas of the ventilated doors to convey depth to the areas. When that was dry, a clear Vallejo matte varnish (70.520) coat was applied as the flat coat.
Weathering layers were next. I applied light grey color to random spots on the metal roof using a micro brush to suggest paint failure. I daub the brush onto the surface or I roll the brush slightly to leave an odd-shaped form. When those are dry, the Vallejo brown wash is used again, but I add a drop or two to a small pool of water to diminish the strength of the color. This is liberally brushed onto the roof and running boards.
When the wash is dry, I turn to Pan Pastels for the next layers. I apply raw umber (780.5) along the side sills and on the truck sideframes to represent dust. I also streak this color on the car ends using a micro brush to pull color from the bottom of the end sill up towards the middle of the car end. Soot for the roof is next. I scrubbed neutral grey extra dark (820.1) onto the roof surface and running boards. I use a micro brush to scrub the color just under the running boards as best as I can. Keep a cotton swab handy to remove any excess Pan Pastel material.

The above image shows the other side of the car. I apply light amounts of the soot color to the upper reaches of the car sides and ends. I model 1926 and there was a great deal of soot in the air from factories, power plants, homes, and locomotives.
Another weathering layer covers material applied by workers. Chalk marks, placards, route cards, and remnants of these cards are small details that are easy to add to a model. These elements were featured in an older blog post.
I use bits of newsprint for many of the card remnants. I apply a dot of canopy glue with a piece of wire, then wet one end of a toothpick to pick up a paper bit and place it onto the glue. The chalkmarks are applied using a light grey Prismacolor pencil. Keep the point sharp to draw fine lines. I use an old drafting trick and use fine sandpaper to sharpen the point. Find inspiration from the chalkmarks on old photos. These are pretty easy to add by hand.
Automobile box car

I started a Funaro & Camerlengo Illinois Central automobile box car in April 2024. It’s ready for the paint shop in the image above.

I usually work on the underframe details first. Mounting the trucks and couplers early in the build eases any adjustments. Installing the K brake components, rods, and levers is straightforward. I also added the train line to this model.

I used Yarmouth Model Works etched ladders on this model. These are no longer available but may be reissued by Speedwitch Media whenever the international tariff situation quiets down. I like these ladders quite a bit.
From my photo documentation, this model had the primer and car color applied in September. I mix my own box car brown color using Vallejo Liquid Acrylic burnt umber (821) with two or three drops of Vallejo Model Air aged white (71.132) mixed in the paint cup. This combination has produced a nice milk chocolate brown tone for several models.
Vallejo has reconfigured some of their product lines and I think the Liquid Acrylic line either has a new name or is no longer produced. I picked up a bottle of their Model Color burnt umber (70.941) and it’s not the same. It seems darker than the Liquid Acrylic version. I’ll have to adjust as my last bottles of Liquid Acrylic are used.

After the car color and clear gloss coats, the model is ready for decals! The Illinois Central added 5,300 of these cars to their fleet in the 1923-1926 years. Ray Breyer provided a breakdown of the individual car orders. These single-sheathed cars had a 42-foot outside length and 13-foot, one-inch outside height.
154701-155100 – AC&F built in 1926 – 400 cars
155101-155500 – Pullman built in 1926 – 400 cars
155501-156000 – Pullman built in 1925 – 500 cars
156001-156500 – AC&F built in 1925 – 500 cars
156501-157500 – Standard Steel Car Co. built in 1924 – 1000 cars
157501-158500 – AC&F built in 1924 – 1000 cars
158501-159500 – AC&F built in 1923 – 1000 cars
159501-160000 – WSC&F built in 1923 – 500 cars
The kit-provided decals to not follow the as-built lettering. A fellow Twenties modeler created the artwork from car builder photos. Decals were printed using a Ghost White cartridge in a color laser printer. Application went smoothly and I washed the setting solution off after everything had dried.

Here’s the finished model ready for service. As the model represents a recently built freight car, the weathering applications were lighter than what the C&O car received. Tahoe Model Works 40-ton ARA trucks were used on the model.
That covers two of the recently completed models. A couple more will be featured soon!
Thank you for visiting my blog. You can share a comment in the section below. Follow the instructions so your comment can be posted. All comments are reviewed and approved before they appear. Please share the blog link with other model railroaders. To subscribe to this blog, add your email address to the function at the bottom of the right column on the main page.