Harris & Ewing, photographer. U.S. CAPITOL. DOME FROM RAILROAD YARDS IN SOUTHEAST SECTION. Photograph. Retrieved from the Library of Congress, <https://www.loc.gov/item/hec2008007160/>.
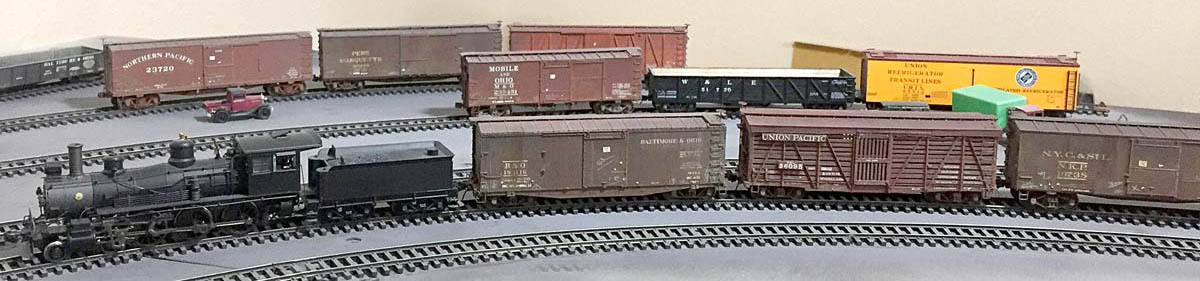
The Wheeling Freight Terminal layout hosted another op session recently, which prodded me to continue the freight car movement discussion. The photo above is similar to many team yard images I’ve seen from the Teens through the 1940s. These have inspired my layout work. Click on any image here to review a larger size.
One of several fine HO scale locomotives Fred Lass displayed at the recent RPM-East meet.
As mentioned earlier, I participated in the RPM-East prototype modeler meet held in Greensburg, Pa at the end of March. It was another festive weekend of railroad history, ideas, models, and time shared with old and new friends. Nearly 500 models were on display and 37 presentations filled the schedule. About 165 attended this two day event. A couple of photo galleries are available for viewing. These offer a decent review of the models on display at the meet.
That’s always a good question for me. In addition to the time at the prototype meet, I visited many of my family members in the metro-Pittsburgh region. I arrived back in far west Texas in time to be hit by spring allergies that are now loosening their grip. I need to survey a few hobby projects and dust off a couple of drafts for the blog to keep this fresh. There are always a few more ideas to share. Stay tuned!
Here we are at RPM-East in Greensburg, PA. I’m posting this as a demo during my Introduction to Blogging presentation. There is a lively bunch of people here and the model room is filling up with some outstanding displays. Click on any image here to review a larger size.
The model room quickly filled with fine work in many scales.
Last night I operated on Ken Hanawalt’s Turtle Creek railroad until my legs had decided to call it a night. Several others RPM-East folks were operating on other area model railroads.
This is one of the many industrial towns served by the Turtle Creek railroad.
Friday is coming to a close but there is much more on tap for Saturday. I hope to post additional images soon.
As winter thaws, it becomes RPM season. Railroad Prototype Modeler meets are a great way to recharge the batteries after a tough winter. A solid presentation schedule and an extensive model display room are the two main components of these events. You will also meet some great people who share similar interests. I’ve enjoyed great conversations at RPM meets over the years that have pushed my model projects along. Many of these conversations have turned into wonderful friendships.
I’ll be attending RPM-East, which is coming up in just a couple of weeks. My presentation is about halfway ready.
Here’s a short list of upcoming RPM meets. Support the event that is close to your neighborhood.
The first B&O Wheeling Freight Terminal operating session of 2015 was held on January 30th. Mike came in from Las Cruces to participate. I think this was the fifth session since operations began in late June 2014. While the layout is not large, we did move 71 freight cars in a three hour session. Some of the operating methods have altered since the first session and I wanted to share these ideas. This will probably end up as two or three parts so I don’t bore anyone with too much detail in one sitting.