
I found another unfinished model last week and I can’t recall when I started on this build. I’m pretty certain it’s only been sitting for a year and I remember why it was put away. I stopped this build because of the non-standard sill steps that needed to be bent from a flat piece of brass shimstock. I did one and put the model away. But it’s back and I finished it this past week.
Prototype
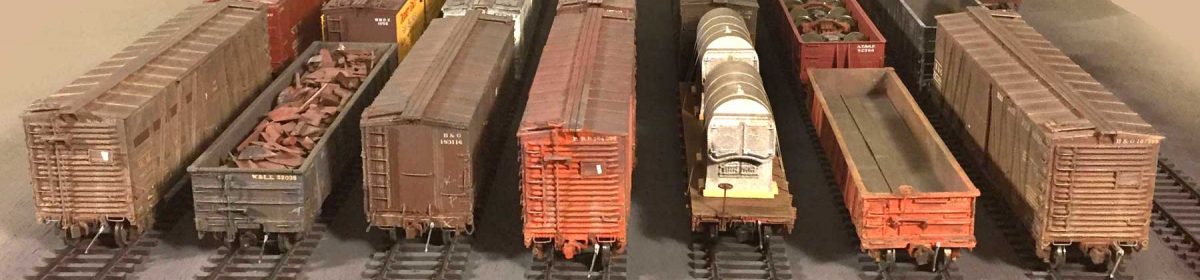
This is an HO scale Westerfield resin kit for a Baltimore & Ohio M-13 class box car. The B&O installed 4,500 cars following this design in the first decade of the 20th century. Here’s the breakdown.
- M-13 class – 2000 cars installed in 1905 and 1906
- M-13a class – 1,700 cars installed in 1910
- M-13b class – 300 cars with wider door opening for automobile delivery installed in 1910
- M-14 class – 500 cars ventilated cars installed in 1910

Additionally, the M-13 car design was similar to 1,300 M-12 box cars the B&O installed in 1902. The B&O was controlled by the Pennsylvania Railroad at that time and the M-12 cars were copies of the PRR XLA box car design.
Model
Frankly, I don’t recall much of this build and I have no photos as the camera function on my iPhone was not working for several months in 2014. I recall one of the challenging parts was attaching the fish belly side sill to the car side as they are separate parts. I used clothes pins as clamps to hold these in place while the adhesive set. Scraps of paper towel were used under the clothes pins to protect details on the castings.
But the sill steps stopped me cold. The prototype was designed by a B&O guy by the name of Tatum and he held several patents on different freight car hardware that was mainly used on B&O freight cars. For this model build, I had developed Tatum Sill step phobia.
After rediscovering the partially built model, I realized I needed to finish it as I did not have any B&O box cars for the Wheeling Freight Terminal. I have two more M-13 kits on hand and a few M-15 box car kits, too. All of them will need these Tatum sill steps, so I could not avoid the situation any longer.
I figured out an easy way to bend the brass strip into the required shape but installing them was the next hurdle. Just gluing these into place invites missing pieces down the road. I decided to drill holes in the short ends of the parts so they could be pinned into place along with adhesive. The initial drilling did not go well and a few parts were mangled. After setting things aside for a day, I realized the holes needed to be drilled at different moments.
I start the process by marking a hole location on the brass stock with an awl and drilling a hole with a #79 drill bit.

The first bend is a few inches from the hole. Scrap styrene 12×12 were used to keep the bends in the right places. One piece is more like a 12×18 for the long leg of the sill step. The brass is bent over the longer piece, then the part is inverted and the rest of the brass is bent over the shorter piece.


At this point there is an urge to trim off the part, but don’t do it! It’s time to drill the other hole. I clamp the brass between two pieces of thin plywood then mark the next hole and drill. Before trimming off the piece, move the brass strip out a bit and reclamp between the plywood. Mark and drill another hole about an eighth an inch from the last hole. Once this second hole is done, then the part can be trimmed. Do a simple 90-degree twist to the short leg and this Tatum sill step is ready to install. Don’t make all your twists in the same direction as two steps are mounted with a twist the other way.

I found it was far easier to drill the mounting holes before trimming the part from the brass strip. Drilling the hole for the next sill step before trimming off the first really eased this process for me. Carefully file burrs from the parts around the holes and trim the short legs within a few scale inches of the holes.
To install these parts, drill #79 holes for the 0.012-inch wire pins. As the sill steps all came out nearly the same, the holes were drilled in similar spots just under the wood sheathing and on a corner of the end sill. Once the glue sets up on the pins, carefully install the sill step. Trim the pin wire at a steep angle so it goes into the hole easily. When the step is in place, apply a little super glue and let it set up. Trim back the pins just above the step part to finish it off.

After the Tatum sill steps were installed, I wrapped up the uncoupling lever details, the vertical brake staff, and the end ladders. The uncoupling lever install is a little tedious, but it goes easily once you make and install a few of those sill steps.

Now I have my first B&O box car for the Wheeling Freight Terminal. I need to build more, especially the 40-foot M-15 cars as the B&O had 11,600 in my 1926 era. What is really missing are models for the M-8 class B&O box cars. These were 36-foot, double sheathed box cars with truss rods and wood ends. Over 12,000 were on the roster in 1926, so I’ll need to figure out how to bring a few onto the layout.
Thanks for stopping by for another blog post. If you have built a B&O M-13 or M-15 class box car, I’d like to see your work. Leave me a note in the comments section below and I’ll be in touch. Please follow the instructions so your comment can be posted. All comments are reviewed and approved before they appear.
OK, Eric, I’ve got to ask. What is this odd boxcar with a left opening door
door and a deep sidesill? I can’t recall seeing anything like it before though
a few cars with left opening doors have been noticed. It is a nice model and nicely done as well. Are you going to post a photo of it when painted and lettered?
My best, Don Valentine
Don, the model is discussed in the second paragraph. It’s a Westerfield kit for a B&O M-13 class box car. Eventually, this will be painted, lettered, and weathered. This and many orhter resin builds will reappear here with updates on their progress. – Eric